b
u
l
i
l
h
a
k
h
a
n
g

The
monastery
at
Buli
is
located
at
3,300
meters,
a
few
kilometers
away
from
the
village
of
Gaytsa,
in
the
region
of
Bumthang.
It
is
reachable
from
Thimphu
after
eight
hours
driving
along
winding
roads.
Dating
back
to
the
14th
century,
it
has
been
widely
modified
with
the
passage
of
time,
thereby
making
it
difficult
to
consider
the
paintings
within,
either
for
quality
or
technique
of
execution,
contemporaneous
to
the
foundation
of
the
monastery.

The
primary
aim
of
the
project,
carried
out
by
John
Sanday
Associates,
was
to
train
local
people
to
restore
the
wall
paintings
in
Buli’s
monastery.
The
paintings,
executed
on
three
stories,
were
painted
in
different
periods.
Many
dissimilar
typologies
of
damage
were
evident.
The
target
was
to
complete
the
restoration
project
carried
out
by
Rodolfo
Lujan
Lunsford
from
2002
to
2004.
The
project
employed
14
locals
who
were
trained
in
essential
restoration
techniques.
These
villagers
worked
even
without
the
consultant’s
presence,
thanks
to
the
supervision
of
specialists
from
the
National
Institute
for
Zorig
Chusum.

first
floor
-
the
vestibule

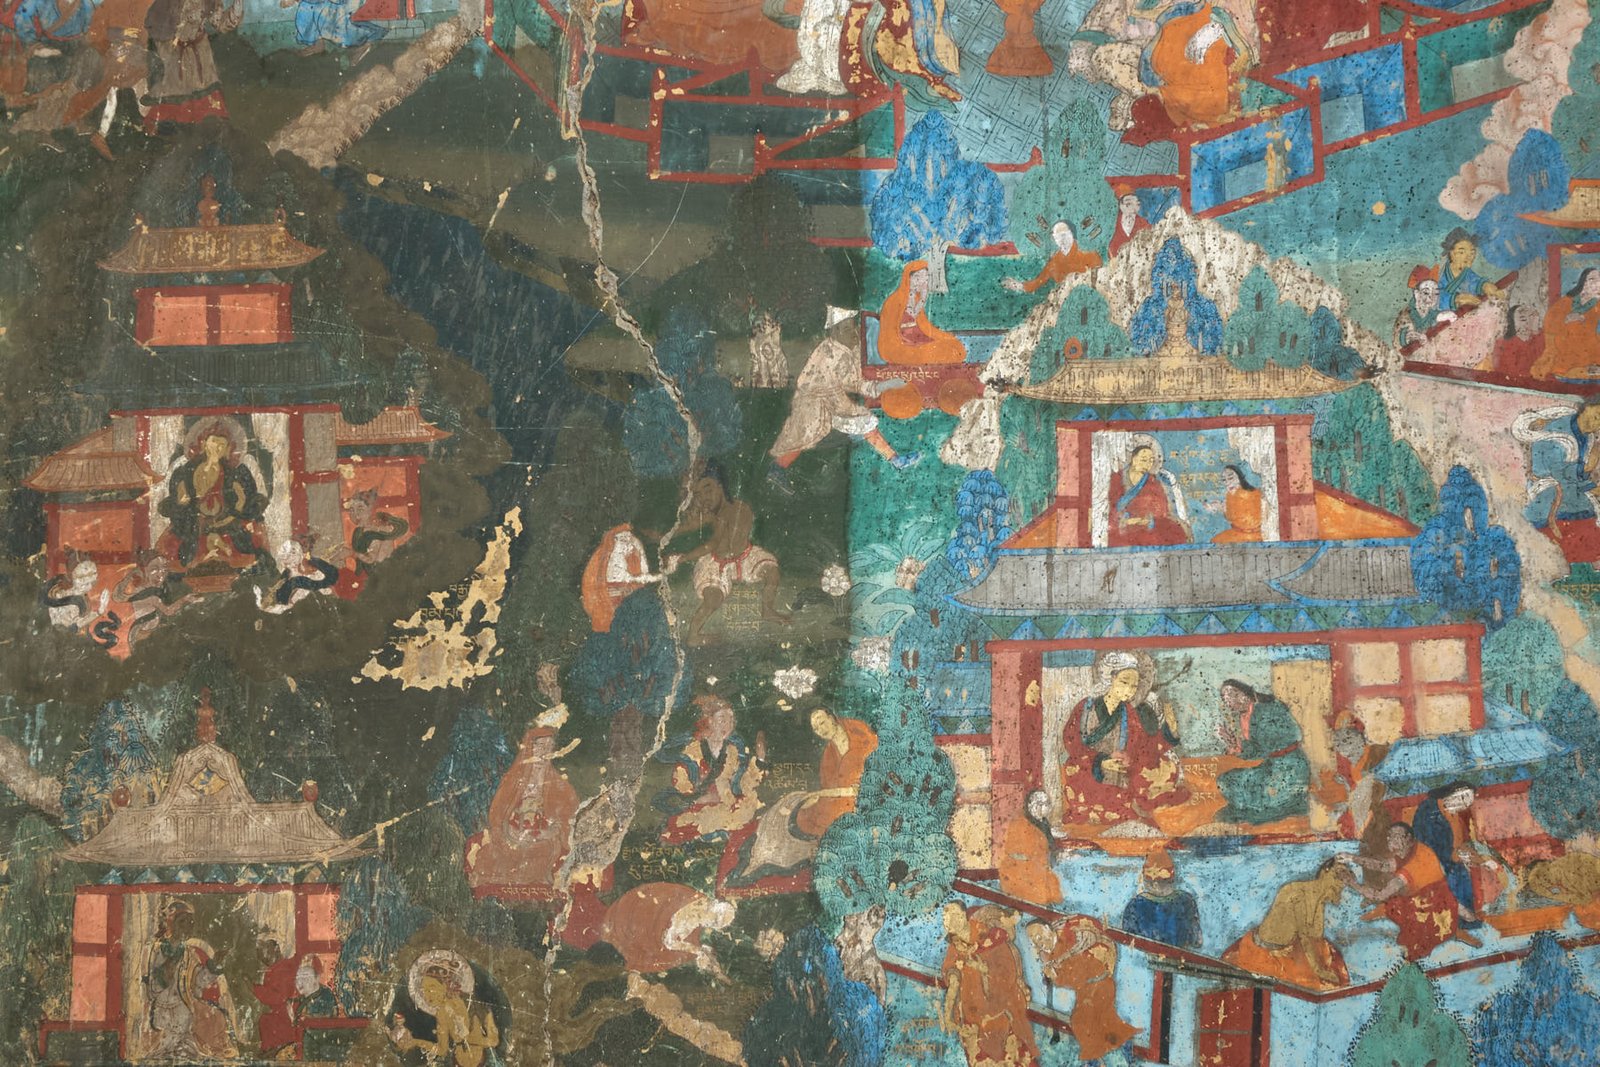
The
state
of
preservation
of
the
vestibule
was
in
very
severe
conditions.
The
wall
paintings
were
coated
with
a
thick
aged
brownish
varnish.
Cracks
and
losses
of
paint
layer
were
generally
present
on
the
surface
of
the
wall.
Few
portions
of
wall
paintings
had
collapsed
and
a
roughly
made
plaster
was
badly
applied
in
recent
times
to
fill
the
missing
parts.
The
painted
wood
of
the
architrave
was
blackened
and
very
few
traces
of
painting
could
be
seen.

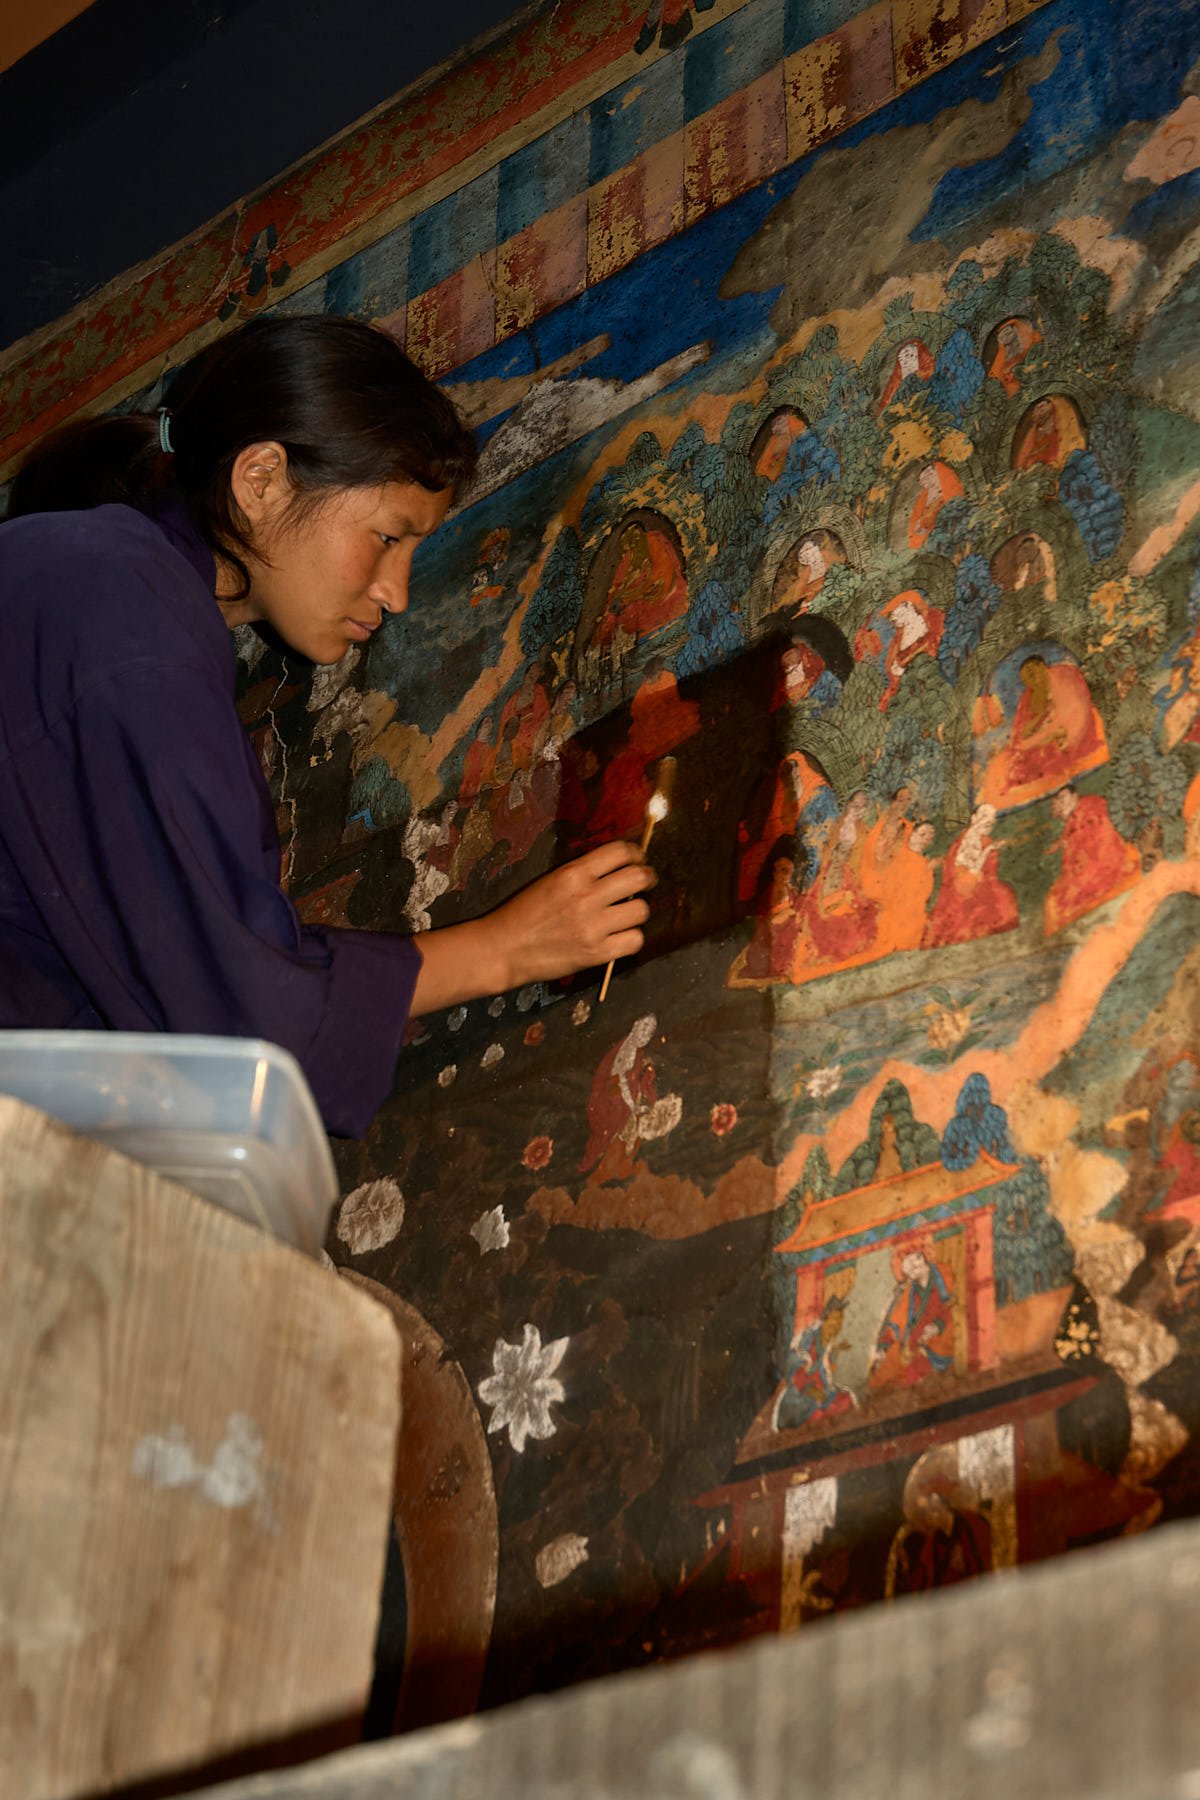
The
Wall
Paintings:
the decision of cleaning before consolidating was chosen in this situation as well. Deposits and dirt were dusted off using soft brushes and only few sections, where the paint layer was in risk of falling, were left untouched. In that case the paint layer was consolidated and subsequently dusted off and cleaned. In some cases of flaking paint layer, action was required prior to any intervention of cleaning: scales were softened with a surfactant solution through syringe, then an acrylic solution was injected on the back of the scales. The scales were set back in position with a slight pressure of spatulas wrapped in cotton/plastic. The excess of acrylic binder was removed with cotton swabs and water.

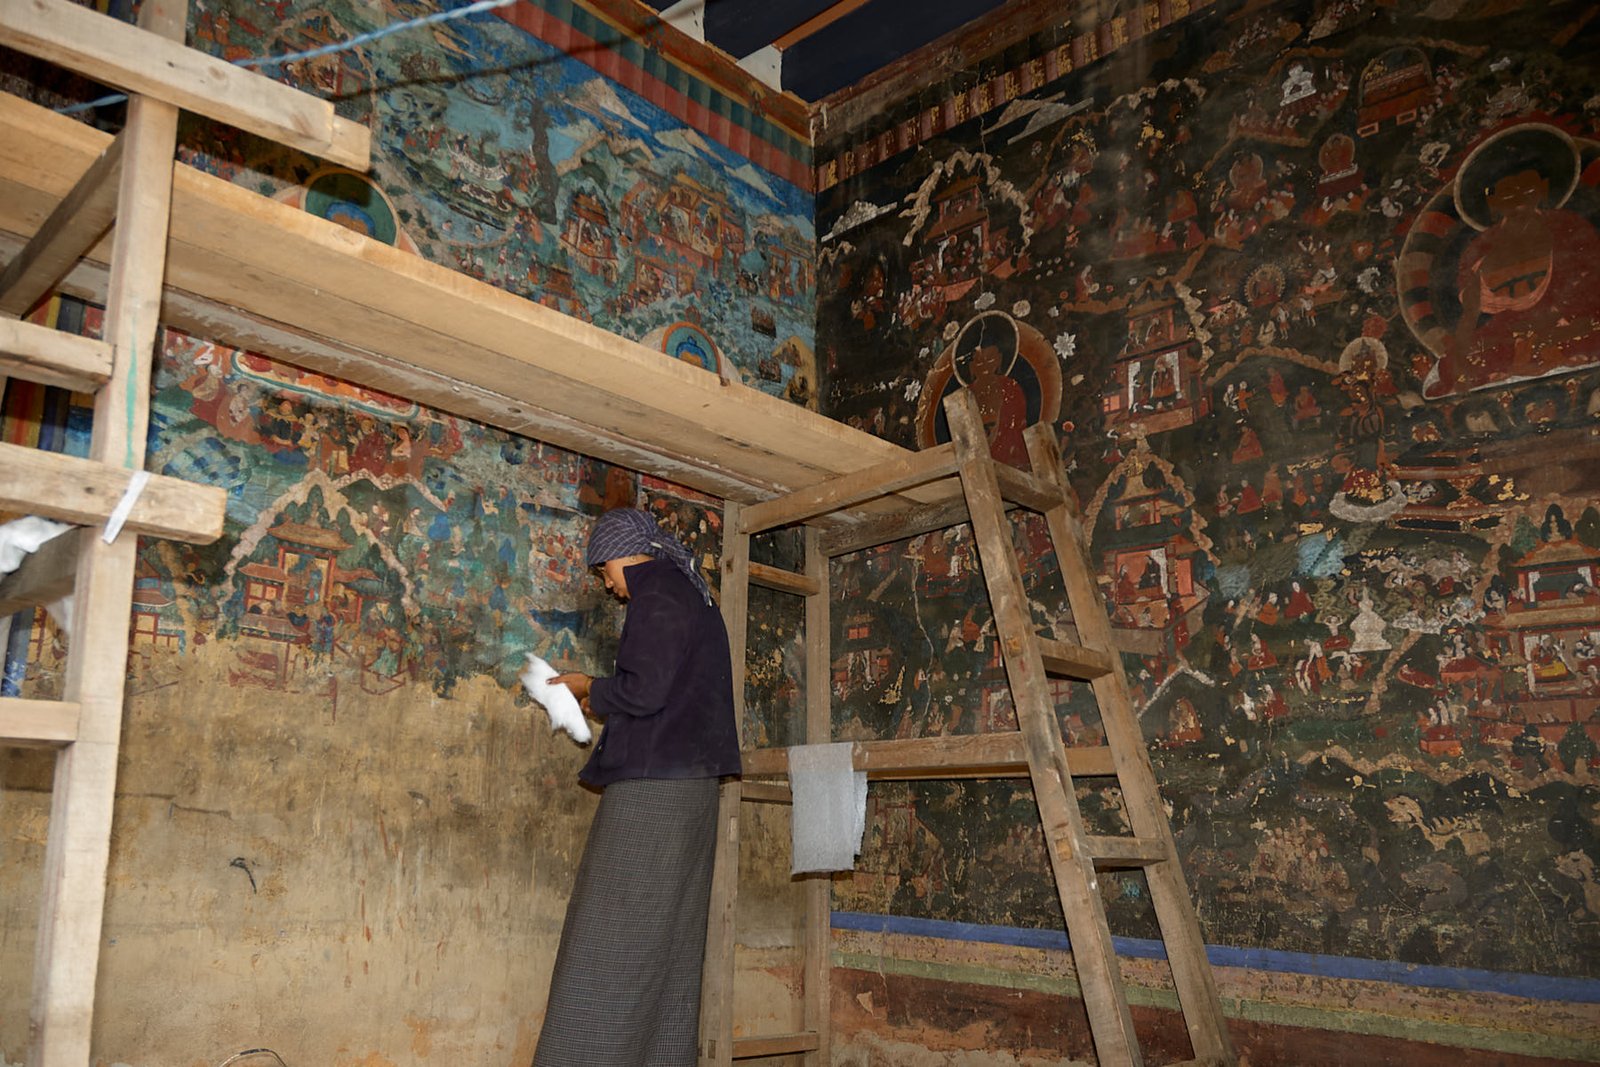
The
cleaning
was
carried
out
in
two
times.
At
first,
the
grime
was
thinned
down
using
cotton
swabs
and
organic
chemicals.
The
cleaning
was
completed
the
following
day
with
the
help
of
Japanese
tissue
paper:
a
solution
of
EDTA
disodium
and
ammonium
bicarbonate
in
water
was
alternated
with
an
organic
chemical
until
all
the
soot
and
the
varnish
were
removed.
A
further
washing
with
Japanese
tissue
paper
and
distilled
water
was
required
to
remove
any
deposits
of
the
salt
from
the
paint
layer.
All
cracks
were
sealed
prior
the
consolidation
intervention
with
a
plaster
made
of
local
clays
mixed
with
a
PVA
binder.
The
entire
surface
of
the
walls
was
checked
and
all
the
areas
that
weren’t
sound
enough
were
filled
by
injecting
a
mixture
of
sifted
local
clay
and
an
acrylic
binder
solution.
Every
injection
of
mortar
was
preceded
by
the
injection
of
a
surfactant
solution.
When
the
gap
was
very
thin
the
clay
wasn’t
employed
and
only
the
acrylic
solution
was
injected.

Cracks
and
lacunae
were
plastered
at
the
same
level
of
the
paint
layer
using
a
whitish
clay
mixed
with
a
PVA
binder.
Deep
and
large
gaps
were
plastered
in
two
or
three
layers
according
to
the
depth
of
the
gap.
A
first
stone
based
plaster
was
applied
so
as
to
reinforce
the
structure
and
to
level
the
missing
section.
After
drying,
a
rough
coating
of
sifted
clay
mixed
with
a
PVA
binder
was
put
and
left
to
set.
At
last
a
mixture
of
fine
sifted
whitish
clay
and
PVA
binder
was
applied
up
to
the
level
of
the
pictorial
layer.
Where
the
gaps
were
not
too
deep
the
coating
made
out
of
rough
clay
was
skipped.
At
the
end
the
final
plaster
was
smoothened
using
sand-paper.

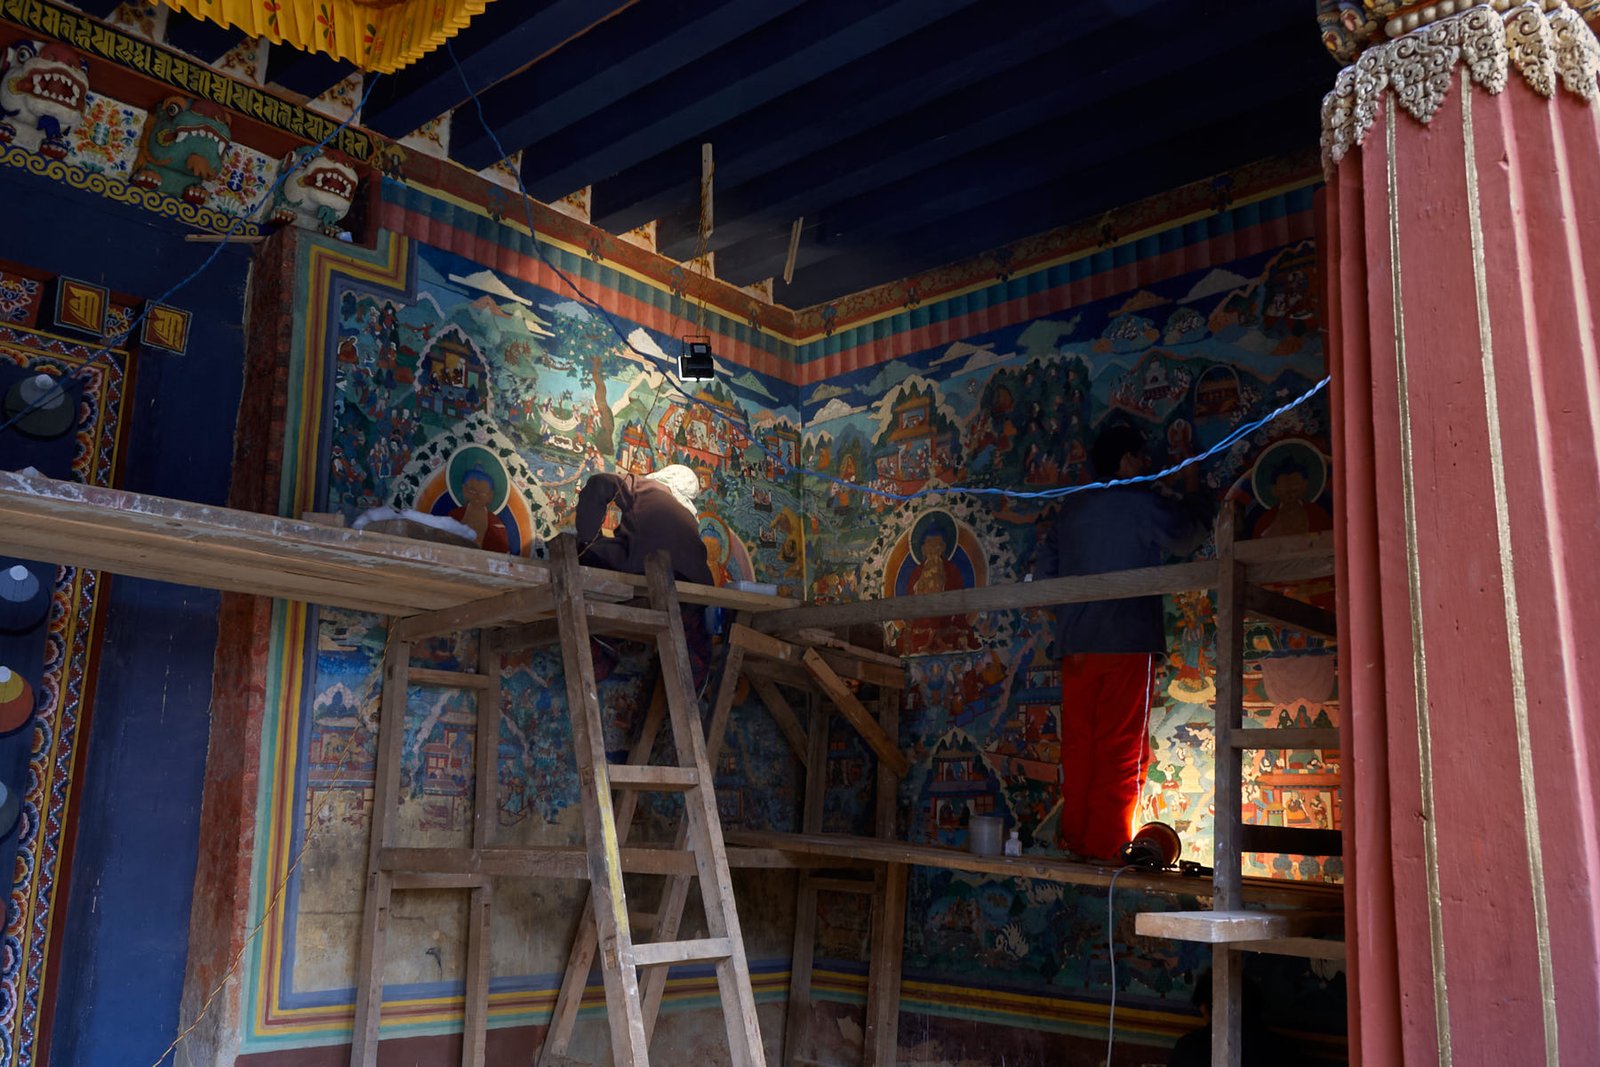
The
pictorial
intervention
was
meant
to
tone
down
all
the
abrasions
and
the
losses
of
colors
that
were
disturbing
the
look
of
the
wall
paintings.
In
this
case
too,
the
large
lost
areas
and
the
uncompleted
sections
on
the
lower
side
of
the
north
wall
were
decided
to
be
reintegrated
in
order
to
fulfil
the
decisions
of
the
Home
Ministry.
Abrasions
and
losses
of
colors
were
toned
down
with
watercolors.
The
plasters
that
had
to
be
reconstructed
were
painted
with
a
base
color
made
of
natural
pigments
and
Arabic
gum.
The
color
was
then
matched
with
the
original
paint
layer
using
watercolors.

The
Architraves:
the wooden architrave on the south wall presented traces of paintings in very bad conditions. The one on the north wall presented some decorations plus five carved lions inserted in it. The blackish layer of grime and varnish was thinned down with an organic chemical and the aged varnish was removed using Japanese tissue paper and cotton swabs soaked in a saturate solution of ammonium bicarbonate. A further washing with distilled water was required to remove any deposits of salt. The heavy abrasions and the missing parts were reconstructed using natural pigments mixed with a slight percentage of Arabic gum. The sections where the paintings were still present were retouched using watercolors.

first
floor
-
the
cella

The
restoration
of
the
wall
paintings
was
almost
complete
on
the
east
and
west
wall.
Few
areas
still
needed
to
be
retouched.
The
eastern
side
of
the
west
wall
was
nearly
finished
while
the
western
side
was
only
consolidated
and
a
fragment
of
painting,
previously
detached,
had
to
be
set
back
to
the
wall.
The
work
on
the
north
wall
was
not
started
yet.
The
statues
and
their
pedestals
needed
an
intervention
of
restoration
as
well.

South
Wall:
a portion of wall paintings on the west side had been detached in one of the previous missions and it had to be prepared before setting it back to the wall. The paint layer of the fragment had been protected with a layer of Japanese tissue paper and a layer of gauze glued with a dense solution of Paraloid B72. The back of the fragment had to be consolidated through several applications of Primal B60A (5% in water) after the application of a surfactant solution (water-spirit 1:1). Then the uneven surface was made plane with a plaster made out of local clay, strengthen with a PVA binder. After drying, the back was reinforced with two layers of cotton gauze glued with a mortar composed of an acrylic binder and sifted local clay. After that the fragment was turned with the paint layer upward. The facing of the painting, that is the layers of cotton gauze and tissue paper, was removed using cotton compresses soaked in organic chemicals. The area where the fragment had to be placed back was consolidated using an acrylic solution injected where needed. Then a plaster made of the same clay of the render was applied to the wall and the fragment was placed back in his original position before the plaster could set: care was given to merge perfectly all the outlines of the drawing. All the cracks were sealed with a plaster and injections of clay and PVA binder bonded safely the wall paintings fragment back to the wall. A propping was positioned so as to prevent the fragment from falling until the mortar and the binder dried completely.

The
pictorial
intervention
was
completed
following
two
ways
of
intervention.
Abrasions
and
areas
that
could
be
reconstructed
were
integrated
using
watercolors.
Large
areas
of
missing
paint
layer
where
the
original
sketch
was
still
present
were
reconstructed
following
precise
requests
from
the
Home
Minister
and
from
the
Dzongdag.
The
operation
of
reconstruction
was
organised
in
a
way
to
be
totally
reversible.
A
base
color
prepared
mixing
natural
pigments
and
a
low
solution
of
Arabic
gum
was
applied
on
the
surface
of
the
missing
parts.
Subsequently
the
pictorial
integration
was
completed
with
watercolors
to
match
the
original
hues.
The
eastern
side
was
not
completed
yet.
Few
cracks
had
to
be
plastered
and
the
lower
section
had
to
be
retouched.

North
Wall:
since the paint layer was very thin it was decided not to consolidate the murals before the cleaning: this way would prevent any soot or grime from being fixed together with the pictorial layer. Moreover the render and the pictorial layer were dehydrated and it would have been easy for the soot to penetrate into the porous layers and be fixed with the operation of consolidation. The cleaning was divided in two operations. Deposits of grease and grime were taken away using dry Wishab sponges. The old and altered varnish was removed alternating the use of different chemicals. Japanese tissue paper was applied on the paint layer in order to avoid that the rolling or rubbing of cotton swabs could damage the paint layer. A solution of organic chemicals was alternated with a weak solution of EDTA disodium until all the aged varnish and any deposits of soot were completely removed. A further washing with distilled water was required to remove any remains of the organic salt from the surface of the wall paintings.

The
areas
of
the
wall
paintings
that
were
not
sound
enough
were
injected
with
an
acrylic
solution.
When
the
gap
was
too
deep
finely
sifted
clay
was
added
to
the
acrylic
binder
solution
to
be
injected.
All
the
injections
were
preceded
by
the
dispersion
of
a
surfactant
solution
through
syringe.
Cracks
and
lacunae
were
cleaned
properly
and
sealed
with
a
plaster
made
of
clay
and
PVA
binder.
The
retouching
was
carried
out
toning
down
light
spots
and
balancing
the
hues
of
the
paint
layer
using
watercolors.

East
and
West
Wall:
few cracks and holes had to be plastered and then retouched. Some areas needed to be revised because not finished properly.

second
&
third
floor

The
technique
of
execution
of
the
paintings
in
the
upper
floors
is
different
from
the
ground
floor
for
the
murals
are
painted
with
animal
glue
on
a
canvas
subsequently
glued
on
the
wall
(marouflage).
The
state
of
preservation
of
the
wall
paintings
in
the
first
and
second
floor
was
in
quite
good
conditions.
Paintings
were
in
a
good
state
of
preservation
and
only
few
portions
needed
specific
attention.
Portions
of
the
canvas
on
the
southern
side
of
the
west
and
east
wall
were
detached
from
the
wall.
Few
cracks
present
on
the
surface
of
the
walls
caused
the
canvas
to
be
torn
apart.
The
wooden
elements
of
the
very
finely
carved
architrave
were
in
a
good
state
as
well.

The
first
operation
carried
out
on
the
wall
paintings
was
the
cleaning.
Since
the
kind
of
soot
present
on
the
wall
paintings
was
mainly
based
on
deposits
from
butter
lamp
smoke
and
grease,
a
dry
cleaning
carried
out
with
dry
Wishab
sponges
produced
excellent
results.
The
cracks
in
the
walls
were
thoroughly
cleaned
and
then
plastered
under
the
level
of
the
paint
layer:
holes
were
left
in
order
to
allow
a
mortar
to
be
injected
later
on.
The
injection
of
a
mortar
made
of
local
clays
and
PVA
binder
was
preceded
by
the
injection
of
a
surfactant
solution.
Then
cracks
were
plastered
at
the
same
level
of
the
paint
layer
with
a
whitish
clay
mixed
with
a
PVA
binder.

The
back
of
the
canvas
detached
from
the
surface
of
the
wall
paintings
had
to
be
thoroughly
cleaned
from
the
debris
of
mud:
spatulas
and
sand
paper
were
used
to
flatten
the
uneven
surface.
The
wall
had
to
be
flattened
as
well
and
all
the
cracks
and
lacunae
were
plastered.
When
the
mortar
was
dry
the
canvas
was
pasted
back
to
the
wall
with
a
dense
emulsion
of
PVA
binder.
Both
the
surfaces
to
be
glued
were
wet
with
a
surfactant
solution.
Cotton
wrapped
in
a
silk
tissue
was
employed
to
flatten
the
canvas
while
being
glued.
Abrasions,
cracks
and
lacunae
were
pictorially
integrated
using
watercolors.